 Technology News, Reviews and Buying Guides review, monitor review, tablet review, laptop review, mobile review, smartphone review, buying guide,
There are many occasions when I discovered the video that I recorded or downloaded online for commercial use is not as per my need. There is some editing work required to make the video look perfect and move seamlessly when viewed. This kind of editing requires professional touch and dedication to spend hours to sit and do the editing work. Editing work seems easy, but you need to remember that the work is not for the layman. You must have an understanding of various video formats, the cutting style, and the conversion process. Also, the concept of the video which decides where you are willing to cut your video is very crucial in the video editing process.
However, there several video editing software available in the market which you can use to edit your video. While searching video editing software I landed on the Joyoshare Media Cutter website.
Joyoshare Media Cutter is one of the most popular video trimmers used for the merging video & editing audios. Additionally, you can save the final file in a wide range of formats as per your devices.
The information given on the website explained to me everything in the first reading. I was convinced that this software will help me to generate output that I am willing to get.
Without spending time, I downloaded the application on the computer and started using it. I must say it is very impressive software and it has various kinds of functionality inbuild which enables the user to do more editing work.
I am sharing here the complete guide on how to use the Joyoshare Media Cutter for Mac to edit the video.
Step 1: How to Cut and Edit Video/Audio Files
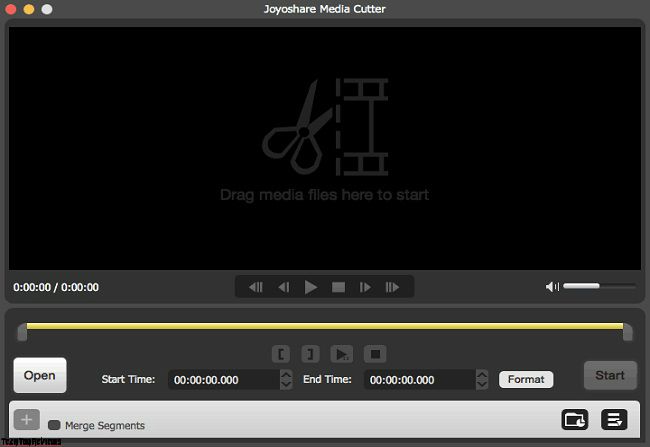
- Open the Joyoshare Media Cutter on your computer/device.
- Add video or audio files to the software. You can also drag the file directly to the application and it will be added to the file.
- Remember, you can only import a file once to the right area.
Step 2 Set the Cut Segment
There are two different options are given to control the editing. Use the control key or just set the temporal interval. Both options are good for cutting the video.

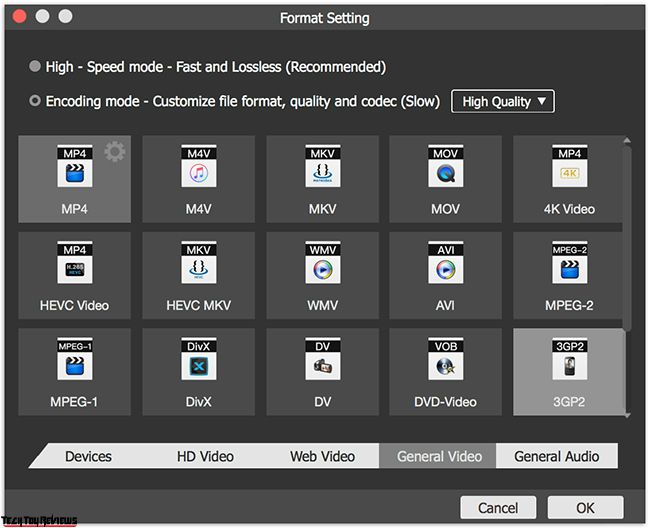
Step 3 Select the Output Format and Destination Folder
Not click the “Format” button. It will ask you to choose whether you want to output in the high-speed mode or encoding mode. High-speed more saves time and gives you the output of Video or audio files quickly. You can also choose the file format, quality, and codes as well.
Step 4 Set out to Cut and Edit the Video/Audio File
Once the editing is done, click on the “Start” button. It may time some time to convert the video and give you the final output. You will find the video/audio file in the destination folder. Click on the icon to open the destination folder.
How to Merge Video/Audio Segments
Step 1. First, increase the segment area by clicking on the “+” sign button or click to the “merge segment” window. Once you click on the button, it will open temporal intervals which allow you to increase the number of footages.
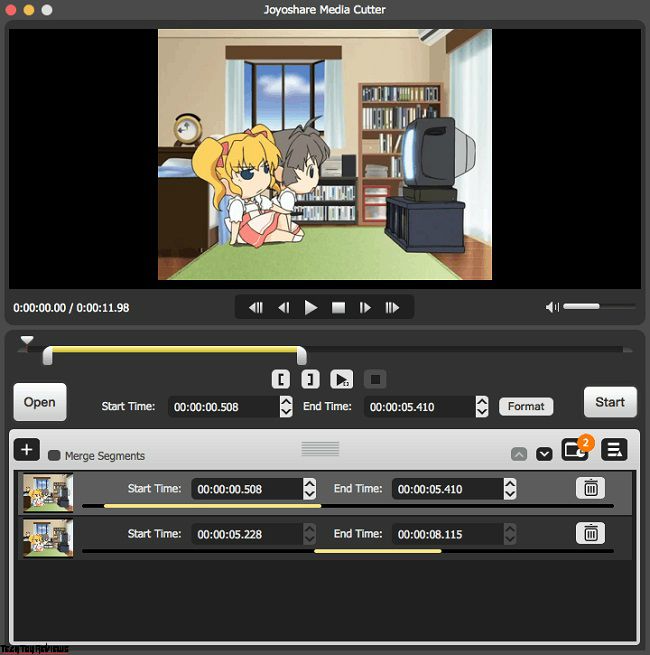
Step 2. Now click to the “Start” button again to edit and select the area of video or audio file.
Step 3. You can also use the “Start” button to open the tour of the merging segments.
How to Edit Video/Audio with Joyoshare
Step 1: Select the video file that you want to edit by simply clicking on the open button. Browse the video in the software and software will add the file and you will be ready to start editing work.
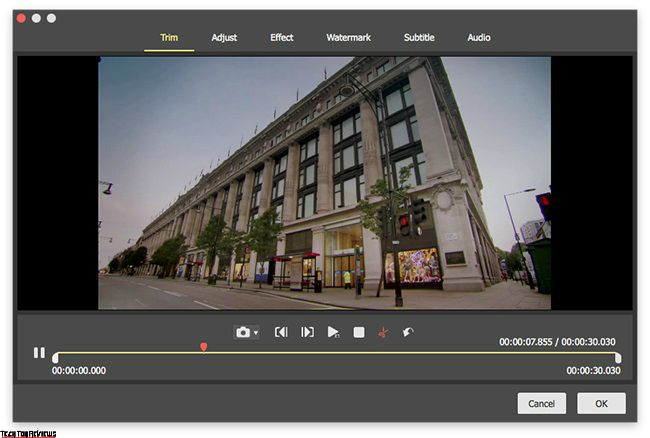
Step 2: You will be given various options in video editing such as:
Trim: This is useful to cut the duration of the video. Decide the start point and end-point and click on the cut icon to trim the video.
Adjust: Change the aspect ratio of the video as per your need. Rotate the video to 90 degrees to the right or left, horizontal or vertical or simply crop the size.
Effect: Make your video professional by adding the video effect. The effect tag gives you multiple options such as brightness enhancement, contrast, saturation, and hue. Choose different frames for the video and make it look more elegant.
Watermark: You may want to give credit to your video by adding your company name or the editor’s name. The watermark allows you to add your name to the video. You can embed text as well as the image watermark on the video. Even set the transparency to make it more subtle.
Subtitle: This feature may useful for the movie editor who would like to add “Subtitle” on their video. You can import the external text file. Options such as font color to match the video screen would help you to make it more readable.
Audio: Adding a soundtrack would be easy with this option. Change volume and weight using this setting. You can also use the special audio effects to the video or even replace the existing audio file with the new sound effects. Follow these steps and you will be able to convert video or audio files in the required format.